Generating pixel art with AI has mixed results, but I’ve found you can improve the output with some basic heuristics. Last year I wrote several libraries for this and then stuffed them in a drawer, but since there’s been some interest in the topic: here’s how to make AI-generated pixel art a bit better with good ol’ image processing.
I’m going to use Python and, if you’d prefer not to write it yourself, I created a public colab that you can just step through.
We’re going to use OpenCV for image processing, which has an interesting Python API (it’s actually a C++ library and it shows).
# If you're using colab, no need to install anything. If you're
# running locally, run:
# $ pip install opencv-python-headless
# You'll also need numpy.
import cv2 as cv

img = cv.imread(path_to_your_jpg, cv.IMREAD_UNCHANGED)
print(img.shape)
This should show the dimensions of the image you uploaded. (If you get an exception about not being able to access shape on None, you probably didn’t put in the right path. Try using the absolute path to the file.)
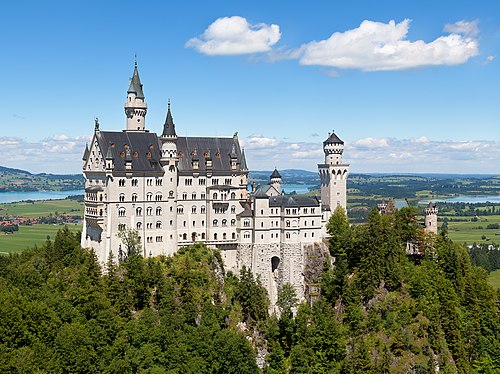
I’m using the Wikipedia image for Neuschwanstein Castle:

Let’s see how pixel-y we can get it!
img is basically a three dimensional array (height x width x color). That is, you can access any given pixel’s color by looking at its (y, x) coordinate:
> img[123][45]
array([243, 218, 176], dtype=uint8)
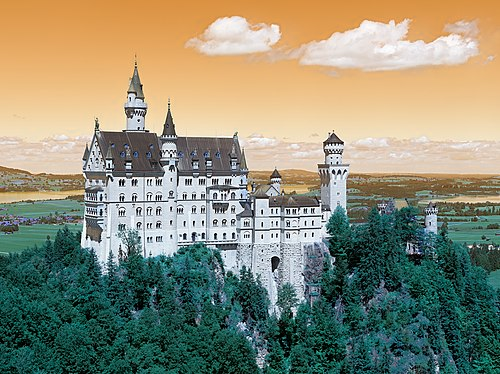
You can see the image by just running “img” in colab. However, you’ll notice that the colors are off and it looks slightly post-apocalyptic:
# If you run:
img
# you get:
This is because OpenCV assumes that pixel color is ordered blue-green-red, not RGB, so it’s swapping reds and blues. (This is apparently a historical accident based on how camera manufacturers did things.) We can swap the colors back to “normal” by using cv’s color transformation function:
img = cv.cvtColor(img, cv.COLOR_BGR2RGB)
# Display the image again. Should look normal now, color-wise.
img
Okay, now we can actually get into image processing! First, we’re going to handle the issue where AI generated images tend to use too many colors for pixel art. I found seven colors was a good sweet spot for pleasingly-retro-but-still-has-nuance, but you can experiment. More colors looked “too detailed” and fewer colors started losing shapes that I wanted. (Heuristically determining a good number of colors from the image’s size and complexity is left as an exercise to the reader.)
So you have seven buckets. For each pixel in the image, which color bucket should you put it in? And what should the colors be? Luckily, we don’t have to figure this out ourselves: an algorithm called k-means clustering figures out what sensible buckets would be, based on the data, and clusters our data into these buckets.
However, first we need to munge our data a little. As mentioned above, img is currently a three-dimensional array (so something like 100 x 200 x 3). We just want to pass the clustering algorithm a list of colors, so we want to flatten our 3D array into a flat list of 20,000 x 3 (100*200=20,000):
import numpy as np

# Magic incantation to flatten the array.
pixels = img.reshape((-1, 3))
# Values are currently uint8 type. Clustering only works on
# floats, so convert.
pixels = np.float32(pixels)
Now we actually call the k-means function. I’ve attempted to give variables sensible names, but OpenCV is not making this easy to understand:
num_colors = 7
termination_criteria = cv.TERM_CRITERIA_EPS + cv.TERM_CRITERIA_MAX_ITER
num_iter = 10
epsilon = 1.0
criteria = (termination_criteria, num_iter, epsilon)

correctness, clusters, centers = cv.kmeans(
    data=pixels, K=num_colors, bestLabels=None, criteria=criteria, attempts=10,
    flags=cv.KMEANS_RANDOM_CENTERS)
The important data returned is the centers (i.e., the color assigned to each bucket) and the clusters (a mapping of each pixel to the bucket it belongs in). We can draw the chosen colors as a nice palette:
palette = np.zeros((100, 100 * len(centers), 3), np.uint8)

for i, color in enumerate(centers):
  cv.rectangle(
      palette, (100 * i, 0), (100 * (i + 1), 100), color.tolist(), -1)
palette
Then we can do some *magic* (of the matrix variety) and mush our mapping of pixel-to-bucket back into a height x width x color array:
# Map each pixel to the correct color for its bucket.
bucketed_img = centers[clusters.flatten()]
# Reshape into the original image's shape.
bucketed_img.reshape((img.shape))
# Let's see what we got:
bucketed_img
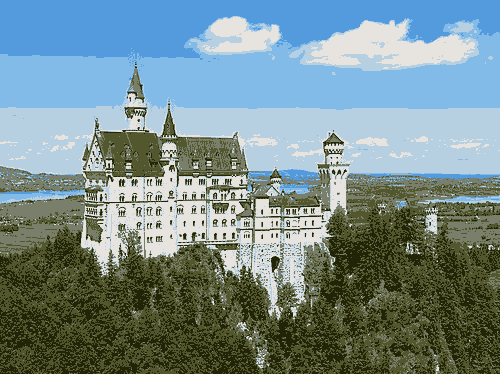
Nice! That’s already looking more like pixel art. Look at that sky “gradient” with those clouds. There’s plenty more we can do: the palette has several very similar colors and there are a bunch of “compression artifacts” from removing colors (e.g., the tip of the tallest steeple), some of which I’ll cover fixing in my next post. But regardless, with a few lines of code, you can turn any image into “pixel art” (of dubious quality).